WooCommerce Connector - Installation and Setup
Prerequisites
- Odoo 18 Community or Enterprise edition
- Active WooCommerce store with REST API enabled
- WooCommerce REST API keys (Consumer Key + Consumer Secret)
WooCommerce API Setup
In your WooCommerce admin panel:
- Go to WooCommerce > Settings > Advanced > REST API
- Click Add Key
- Set Description: 'Odoo Connector', User: Admin, Permissions: Read/Write
- Click Generate API Key
- Copy the Consumer Key and Consumer Secret
warning
The Consumer Secret is only shown once. Save it securely before closing the page.
Instance Configuration
Navigate to WooCommerce > Instances.
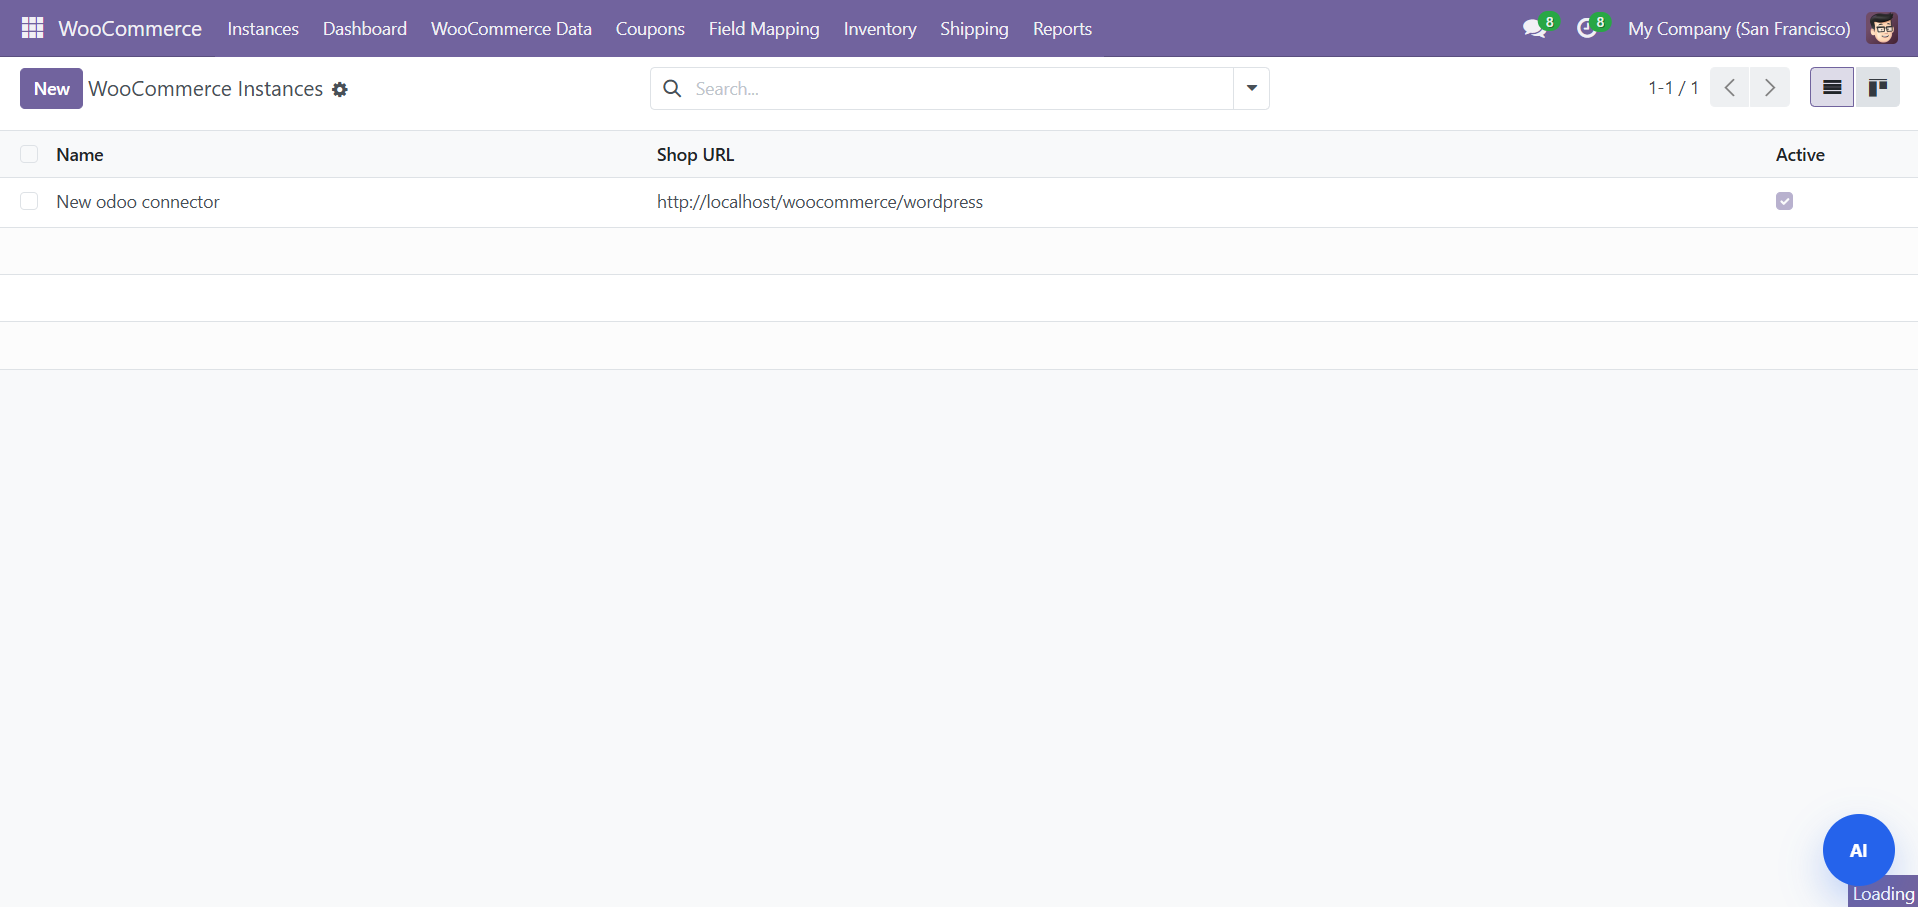
Click New and fill in:
| Field | Required | Description |
|---|---|---|
| Name | Yes | Descriptive name (e.g., "Main Store") |
| Store URL | Yes | Your WooCommerce store URL (e.g., https://mystore.com) |
| Consumer Key | Yes | WooCommerce REST API Consumer Key |
| Consumer Secret | Yes | WooCommerce REST API Consumer Secret |
| Company | Yes | The Odoo company this instance belongs to |
Click Test Connection to verify.
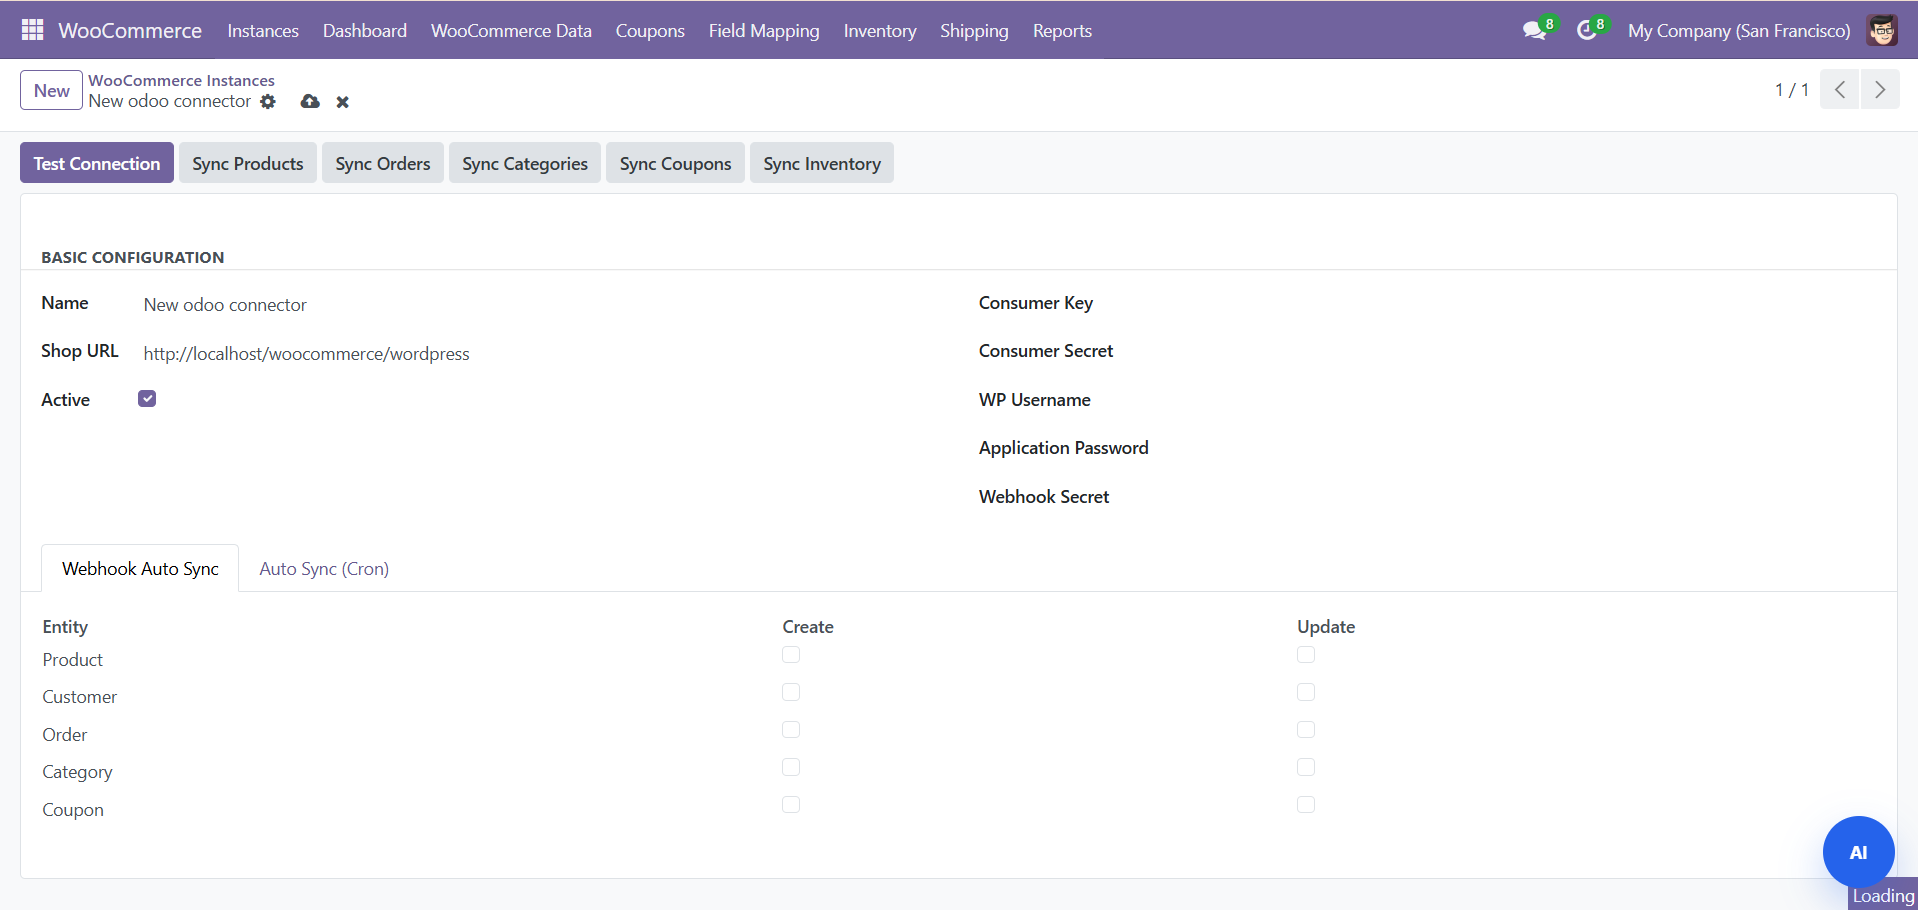
A green 'Connected' status confirms success.
What's next
Once your WooCommerce instance is configured and the connection test passes, you're ready to start moving data. The most common sequence:
- Configure global Settings - webhooks, field mapping, cron jobs.
- Pull your existing products with the first scheduled sync.
- Pull your existing customers - they'll get matched to Odoo contacts by email.
- Run a quick smoke test by pushing one new test order through.
Need Help?
Contact SDLC Corp at sdlccorp.com/contact-us or email sales@sdlccorp.com