ShipStation Connector - Installation and Setup
Prerequisites
- Odoo 18 Community or Enterprise edition
- Python 3.10+
- Active ShipStation account with API access
- Required Odoo modules: base, web, sale_management, stock, delivery, contacts
Installation Steps
- Copy the
shipstation_connectorfolder to your Odoo custom addons directory - Restart the Odoo server
- Go to Apps, remove the 'Apps' filter, search for 'ShipStation', and click Install
- After installation, the ShipStation menu appears in the navigation
Instance Configuration
Navigate to ShipStation > Instances to configure your account connection.
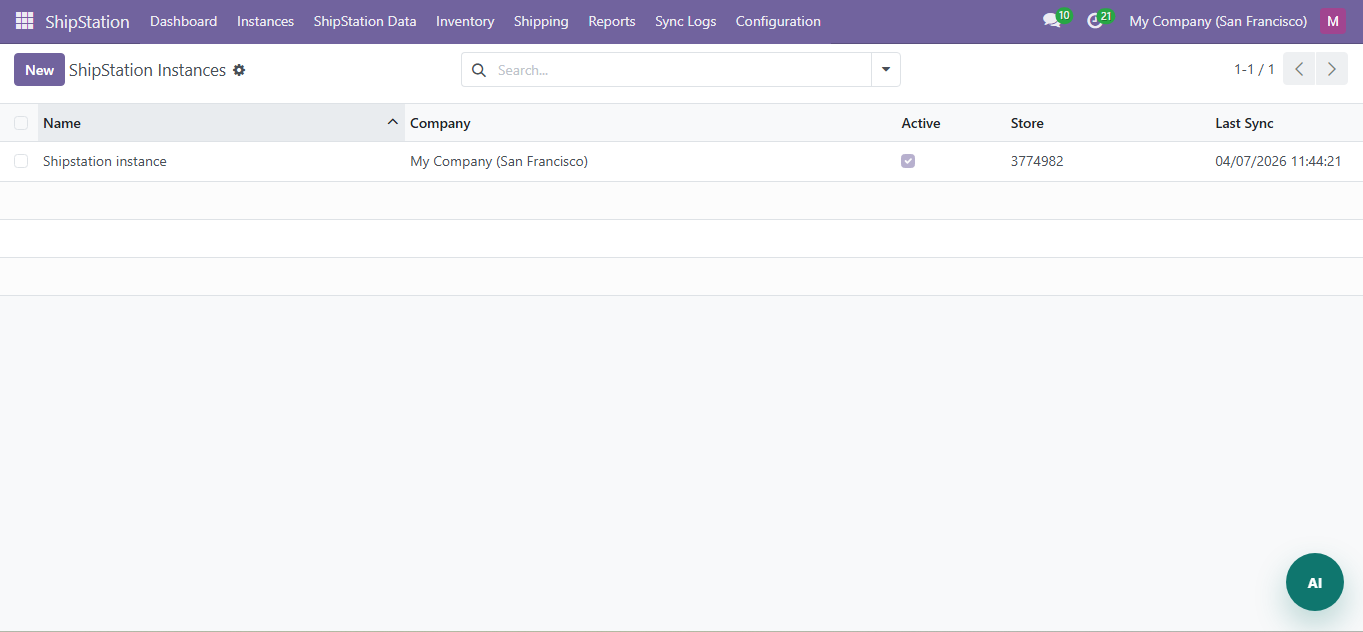
Click New and fill in:
| Field | Required | Description |
|---|---|---|
| Name | Yes | Descriptive name (e.g., "US Warehouse") |
| API Key | Yes | Your ShipStation API Key (from Account > API Settings) |
| API Secret | Yes | Your ShipStation API Secret |
| API URL | No | ShipStation API endpoint (default value pre-filled) |
| Active | No | Enable/disable this instance |
| Company | Yes | The Odoo company this instance belongs to |
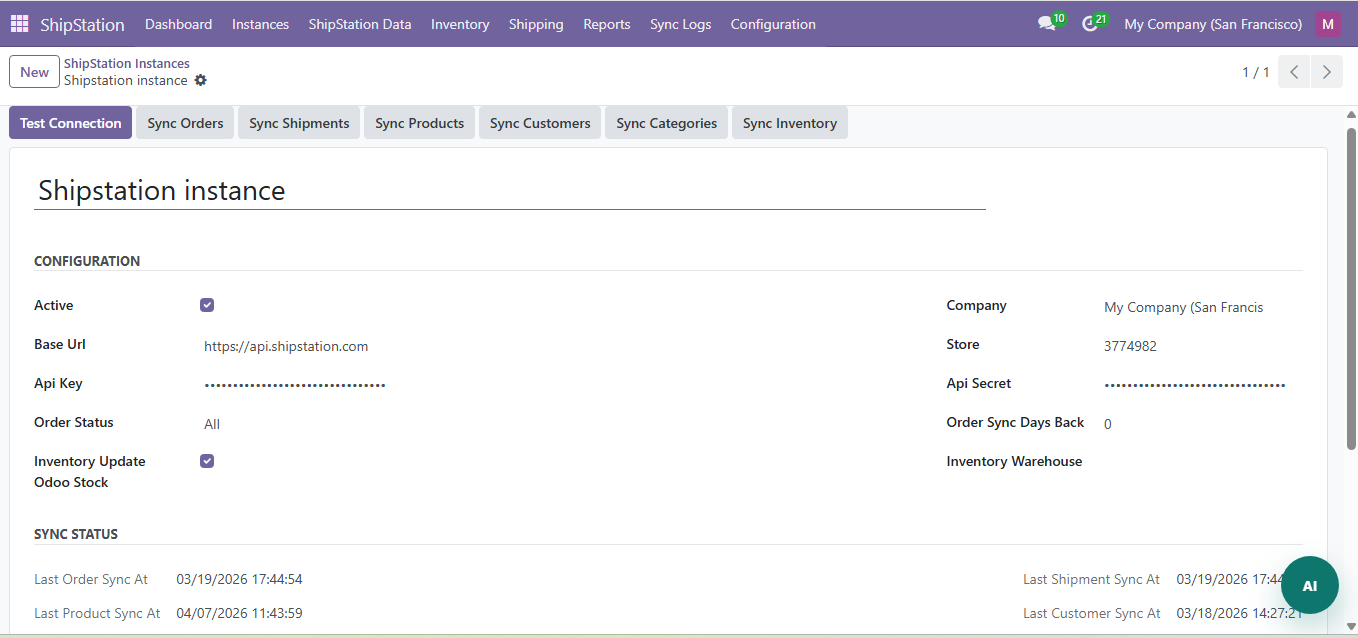
Click Test Connection to verify the API credentials. A green 'Connected' status confirms success.
Sync Settings
On each instance, configure:
- Order Status Filter: all / awaiting_payment / awaiting_shipment / shipped / on_hold / cancelled
- Days Back: How many days of historical data to import (default: 30)
- Auto Sync: Enable/disable scheduled synchronization
Need Help?
Contact SDLC Corp at sdlccorp.com/contact-us or email sales@sdlccorp.com