Creating Reservations
Manage the complete booking lifecycle from initial inquiry to checkout.
Reservation Lifecycle
Draft → Confirmed → Checked In → Checked Out → Done
                                            ↘ No Show / Cancelled
| Status | Meaning |
|---|---|
| Draft | Initial booking, not yet confirmed |
| Confirmed | Confirmed booking (deposit received or guaranteed) |
| Checked In | Guest has arrived and checked in |
| Checked Out | Guest has departed |
| Done | Folio settled, reservation closed |
| No Show | Guest failed to arrive |
| Cancelled | Cancelled by guest or hotel |
Reservations List
Navigate to Front Desk > Reservations to see all bookings in list or kanban view.
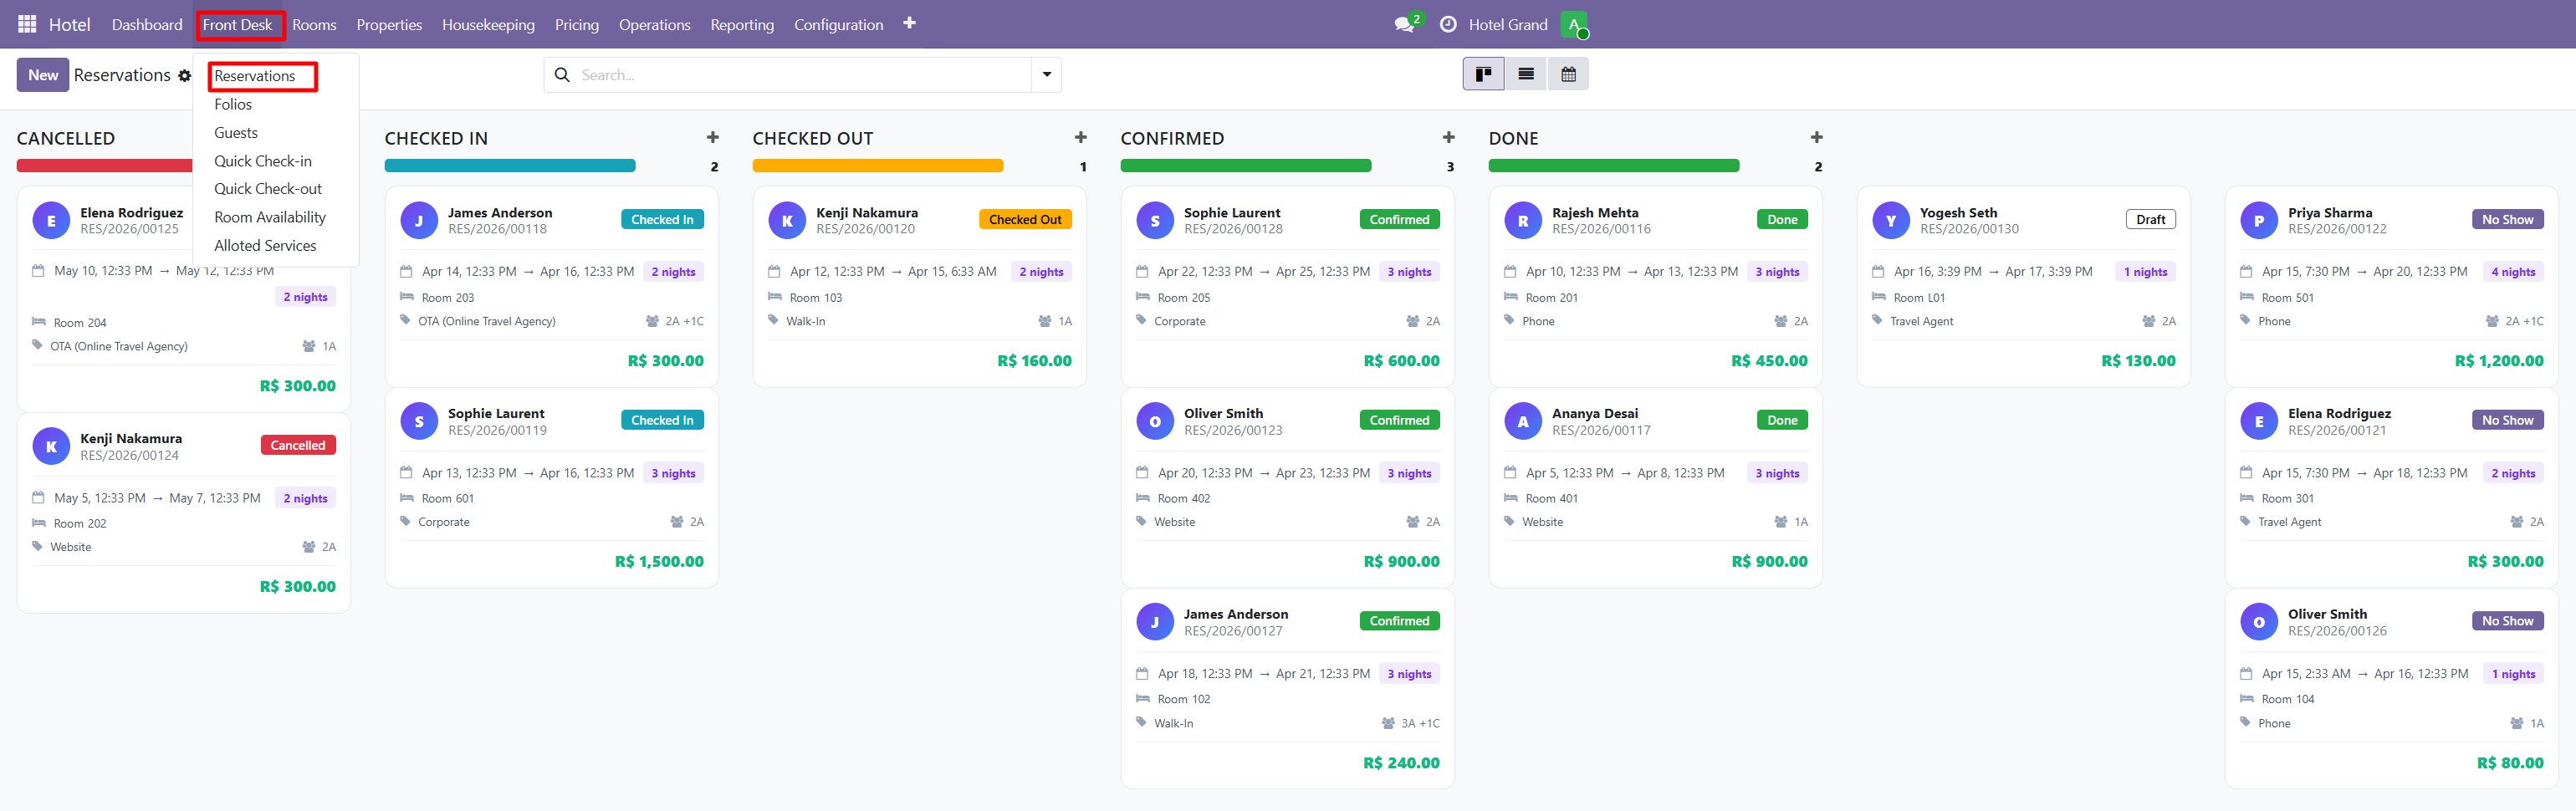
Views Available
- Kanban - Group by status for quick workflow visualization
- List - Detailed tabular view
- Calendar - See reservations on a calendar
- Form - Individual reservation details
Filters
- By property, room type, status
- Date range (check-in / check-out)
- Guest name or booking source
- VIP status
Creating a Reservation
Step 1 - Open the Reservation Form
Click New from Front Desk > Reservations or from the calendar.
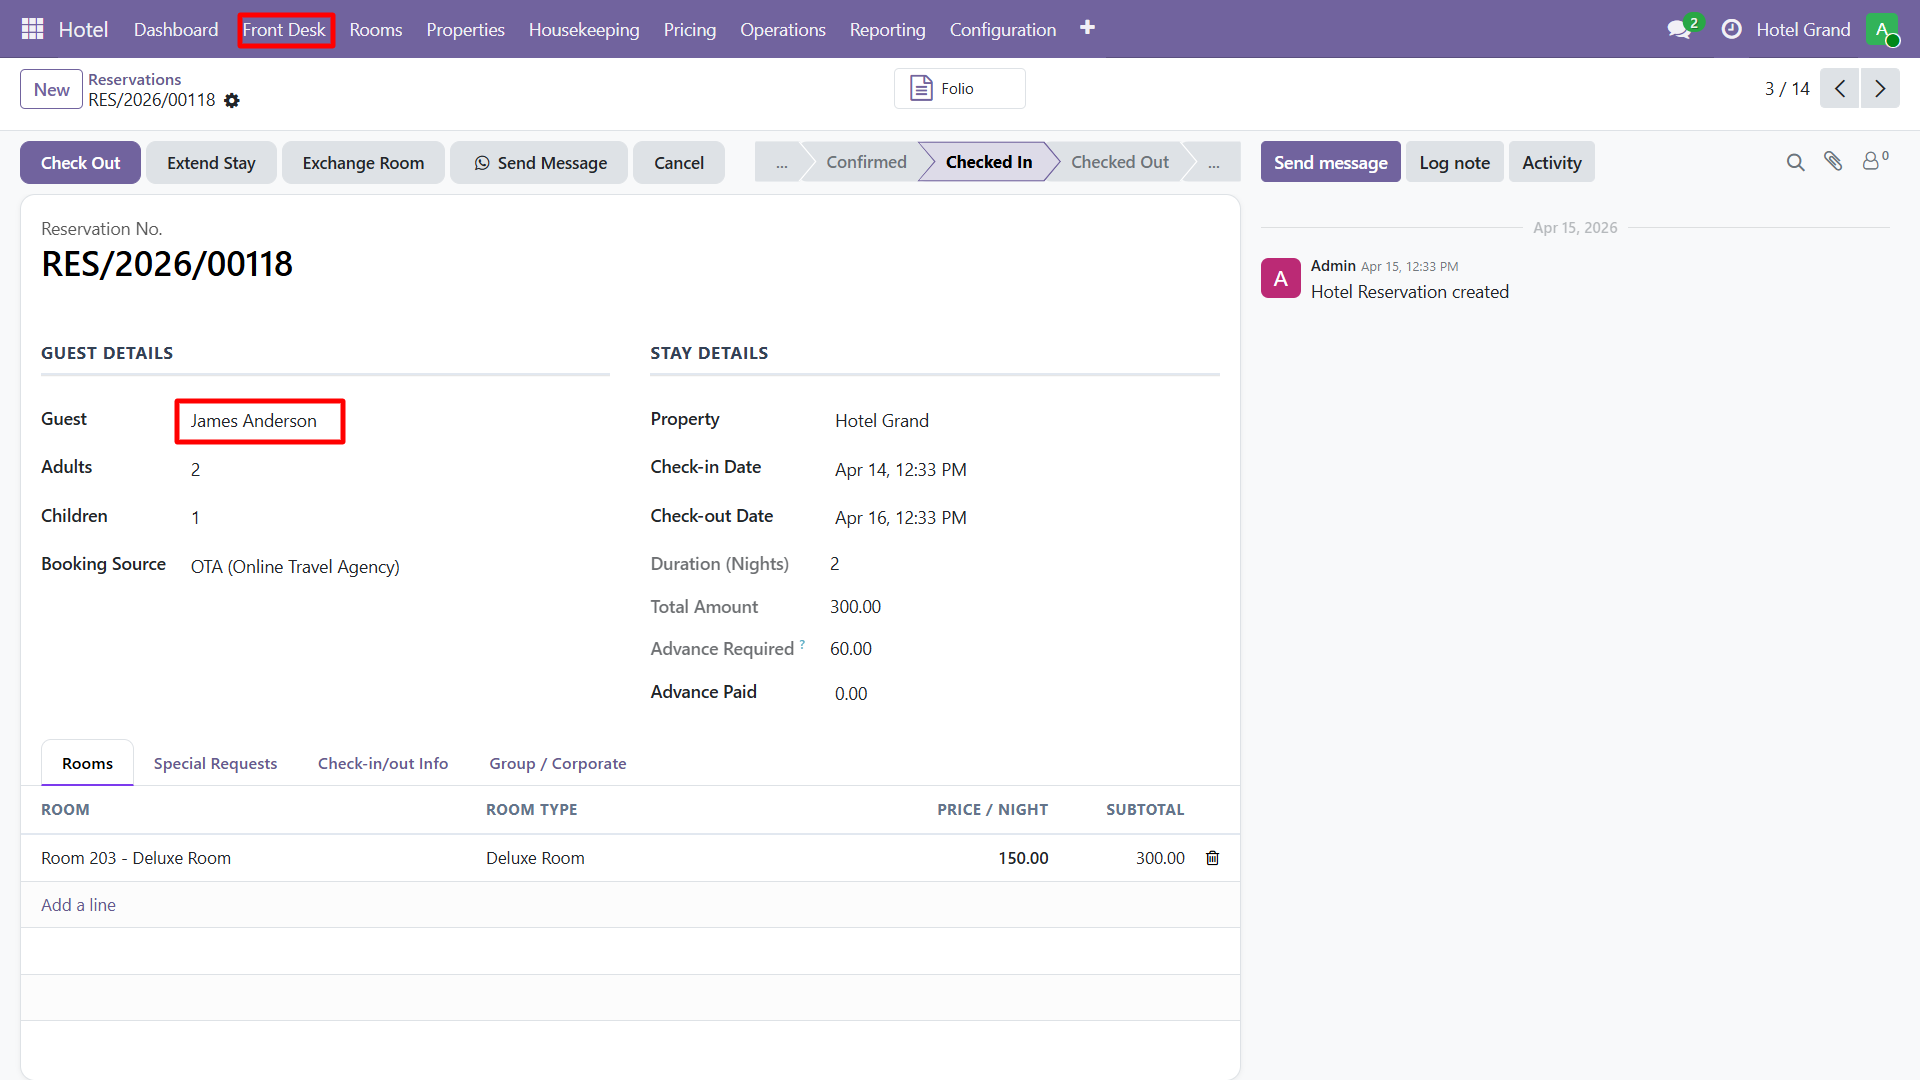
Step 2 - Fill Required Fields
| Field | Description |
|---|---|
| Guest | Select existing guest or create new |
| Property | Which property for multi-property |
| Check-in Date | Arrival date |
| Check-out Date | Departure date |
| Rooms | Add room lines with room type and rate |
| Adults / Children | Guest count |
| Booking Source | Direct, OTA, Walk-in, etc. |
| Rate Plan | Select applicable pricing |
| Special Requests | Notes for front desk / housekeeping |
Step 3 - Configure Room Lines
Add one or more rooms to the reservation:
- Room Type (Standard, Deluxe, Suite, etc.)
- Specific Room (optional - can be assigned at check-in)
- Rate per night
- Adults and children per room
- Extra bed requirements
Step 4 - Confirm the Reservation
Click Confirm to move from Draft → Confirmed status. This:
- Reserves the room in the system
- Sends a confirmation email (if mail template enabled)
- Creates an initial folio draft
Check-In Process
When the guest arrives:
- Open the reservation
- Click Check In button
- The Check-In Wizard opens for ID verification and room assignment
- Confirm room number
- Collect deposit / advance payment
- Status changes to Checked In
Check-Out Process
On departure day:
- Open the reservation
- Click Check Out button
- The Check-Out Wizard opens
- Review folio charges (room, services, minibar, taxes)
- Process final payment
- Generate invoice
- Status changes to Checked Out → Done
Available Wizards
The module includes several wizards to streamline operations:
| Wizard | Purpose |
|---|---|
| Check-In Wizard | Guest arrival process with ID capture |
| Check-Out Wizard | Settle folio and generate invoice |
| Extend Stay Wizard | Change departure date mid-stay |
| Room Exchange Wizard | Move guest to a different room |
| Room Availability Wizard | Check availability for date range |
| Notification Wizard | Send custom email/SMS to guest |
tip
Use the Room Availability Wizard to quickly find available rooms for a date range without leaving the reservation form.
Need Help?
Contact SDLC Corp at sdlccorp.com/contact-us or email sales@sdlccorp.com