PrestaShop Connector — Instance Configuration
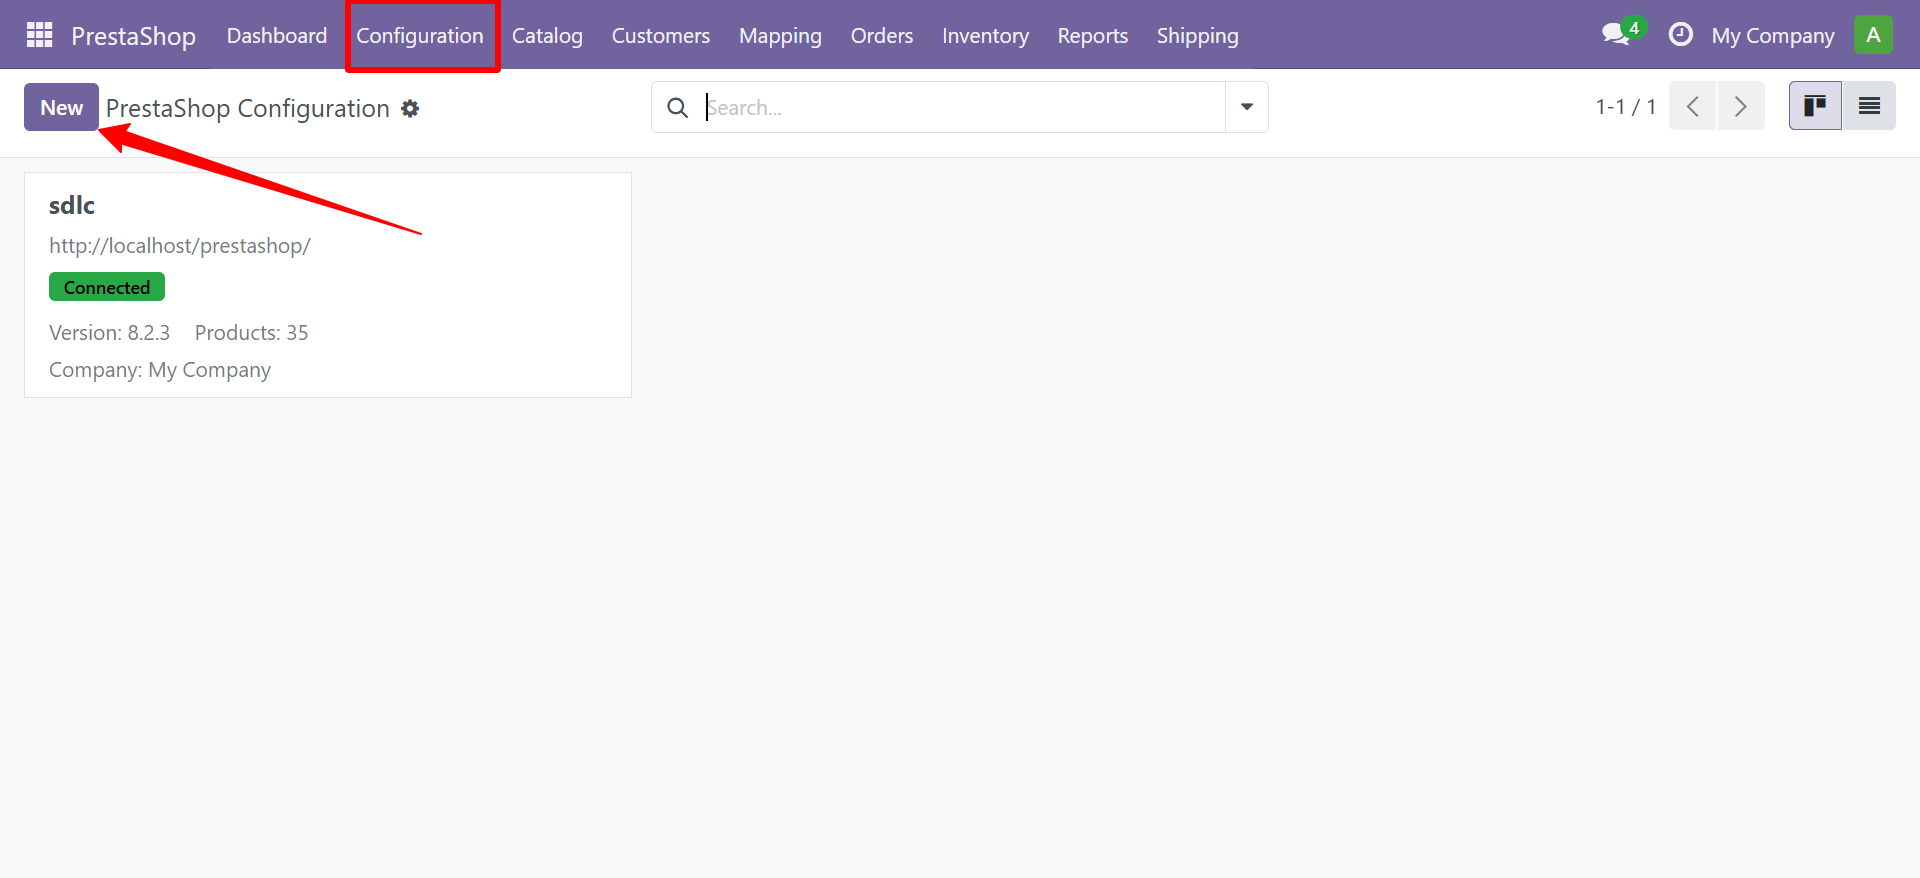
Navigate to PrestaShop > Configuration to manage your store connections.
Creating a New Instance
Click Create and fill in the following fields:
| Field | Description | Example |
|---|---|---|
| Configuration Name | A friendly name for this store | My Europe Store |
| Company | Odoo company this store belongs to | My Company |
| Store URL | Your PrestaShop store URL | https://mystore.com |
| Webservice URL | Custom API endpoint (optional) | https://mystore.com/api |
| API Key | PrestaShop webservice API key | ABCD1234... |
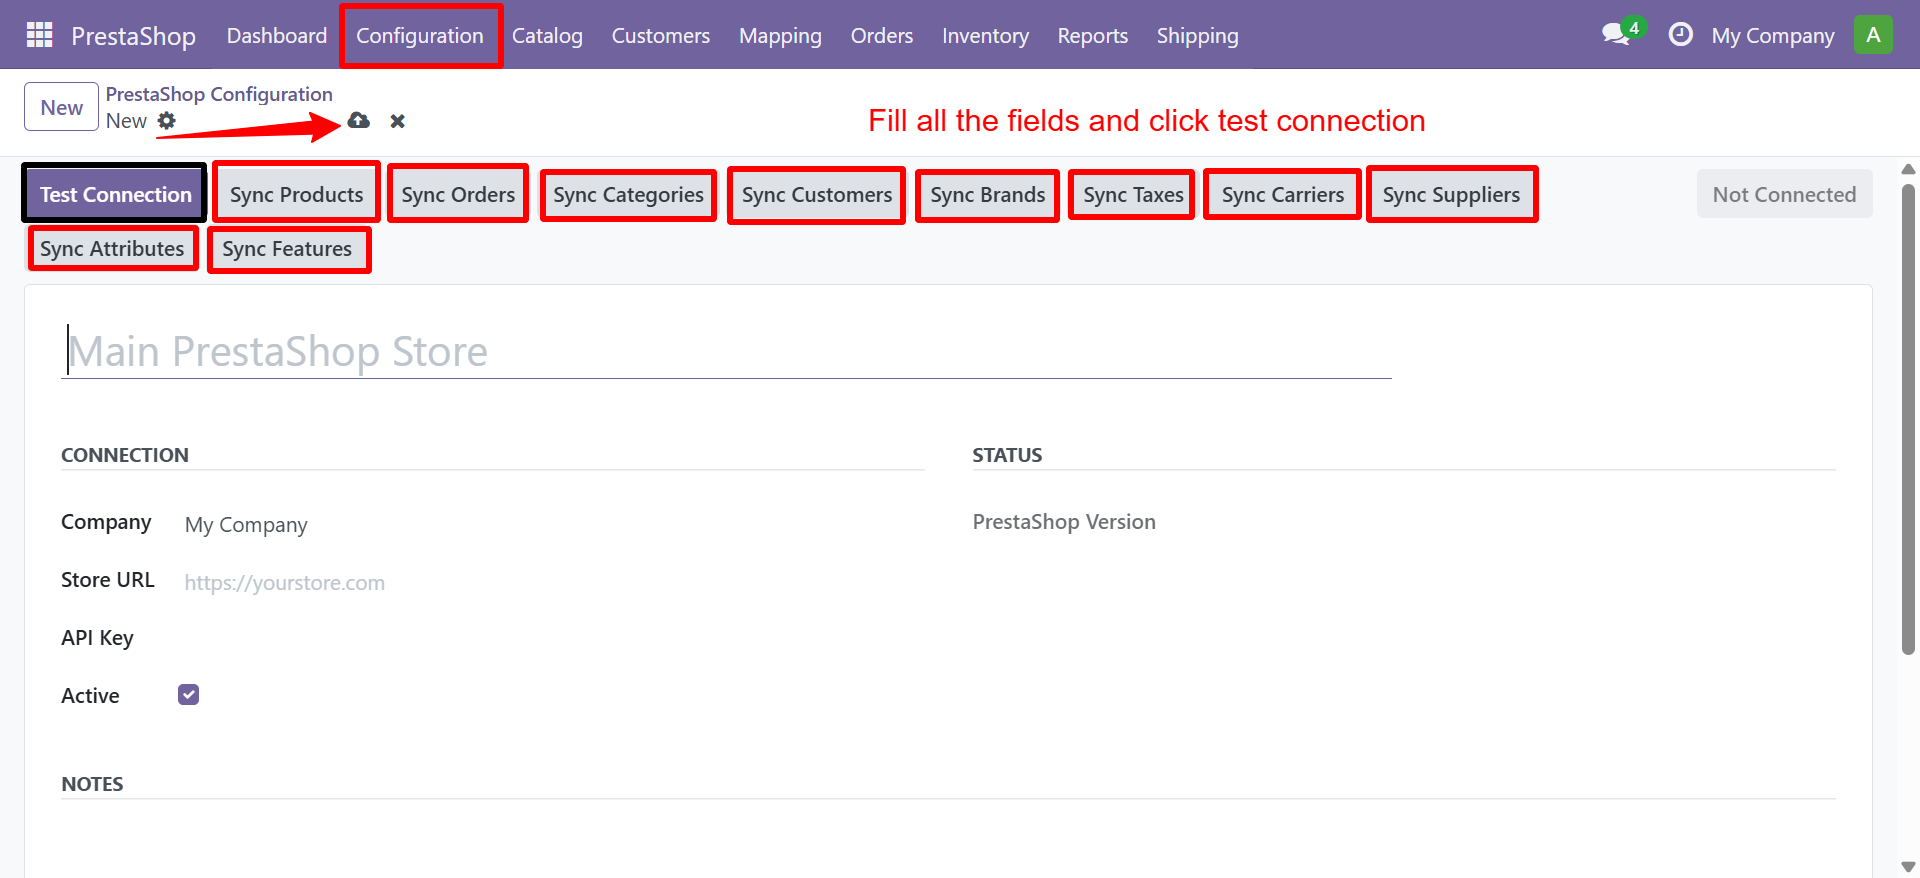
The configuration form shows tabs for all connector modules: Store Product, Store Categories, Store Customers, Store Brands, Store Suppliers, Store Inventory, Store Attributes.
Testing the Connection
Click the Test Connection button in the form header. If successful, the status will change to Connected (green) and the PrestaShop version will be displayed. If it fails, check the Last Error field at the bottom for details.
Sync Buttons
The configuration form header contains individual sync buttons:
| Button | Action |
|---|---|
| Sync Products | Import all products from PrestaShop |
| Sync Categories | Import product categories |
| Sync Customers | Import customer records |
| Sync Brands | Import manufacturers/brands |
| Sync Suppliers | Import supplier records |
| Sync Carriers | Import shipping carriers |
| Sync Attributes | Import product attributes and values |
| Sync Features | Import product features and values |
| Sync Taxes | Import tax rules and rates |
Next Steps
Need Help?
Contact SDLC Corp at sdlccorp.com/contact-us